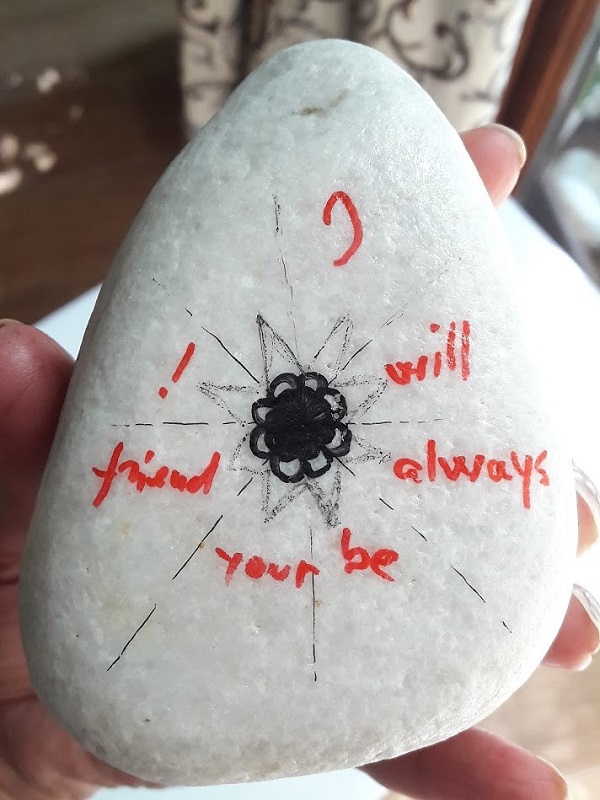
Rock painting is one of the easiest DIY projects one can make. Materials are easily available and you don’t even need to buy them, unless you really don’t have a colored pen in your house (which is impossible, isn’t it?)
There are no rules for drawing, as there are no rules for being creative. Still, if you want to take your rock painting to the next level, then these 3 steps for drawing perfect mandals are exactly what you need.
Keep reading to discover how this patriotic mandala has been made, so you could draw your own!
There’s no other list of materials than the usual one for rock painting: a rock, some thin markers in colors at your choice, and varnish for the final coat.
Any kind of rock would be fit for the project as long as you can easily draw on it with your ink pen, and the ink doesn’t bleed. I advise you to test your marker on a side, because different rocks have different textures. Beach pebbles and landscape rocks work best because are smooth and polished, marble looks fine but ink might bleed on some types of it. Drawing on a flat rock is easier, but mandalas look much better on globular stones!
Let’s Draw!
Wash the rock and let it dry, so you would draw on a clean surface, and the ink would adhere easily. from now on, there are only three mandatory steps to follow in order to draw your perfect mandala.
Step 1
Find the center of your drawing surface and mark it with a small sign. Use this center to draw lines that cut the drawing surface in equal parts or slides, as you see below.

Step 2
Choose one of the slides and draw something in it, starting from the center. Choose something simple to start with, like a leaf or a petal.

Step 3
Duplicate the drawing in the next slides, in the same size. Yeah, I know, it doesn’t look very promising at the moment, but wait for it…

Next, all you have to do is to repeat steps 2 and 3 till you finish your drawing, and get to something like this:

Ok, was it too quick and you need to see it again? Let’s slowly repeat steps 2 and 3, so you could see what I did, copy it and improve your skills.
I added one more petal:

…and one more line and a dot.

And here comes one more leaf to replicate:

A few lines would fit in, I guess…

I also need to add something weird here, like… an alien eye?

And the final touch, a floral one.

Let’s see the result one more time!

OK, it’s pretty clear right now, but there’s still more you can do to improve your painted stone. Like using different patterns and colors to create unique mandalas that would turn any stone in a valuable handmade gift. Here are a few examples that I have created during my last holiday in Greece. You can find out more about these masterpiece by reading this article.

Let’s get back to our drawing lesson! My choice was to color it by adding red and blue. Pretty appropriate, since the 4th of July is around the corner, huh? Uh, and remember to spray a coat o varnish to protect your masterpiece from sunlight, moist and dust.


Does it look different now? Well, it’s the same stone that you were looking at in disappointment at the beginning of this article. And do you know what the most beautiful part is? This is going to be a gift for a very special friend of mine, a veteran from the Korean War.

I hope this article will help you improve your painting skills, so you could create your own painted rocks for decorating your house and your patio, or even gifting your friends.

Did you like this article? Are you looking for other original DIY ideas?
Buy my 5-star rated book and discover DIY projects that will give anyone a good feeling of satisfaction afterwards!


Thank you for sharing this DIY tutorial. It looks so cute.
I loveeeeeeeeeeeeeee it! What a great tutorial. Mandala it is a complicated technique for me but I have to try it. Thank you for sharing 🙂
I am totally happy that you find it useful! I love drawing mandalas too. I think I’ve gifted all my friends with painted stones :))))
Looks so awesome. Art on rock. Gonna try this DIY project with kids. Thx.
Gabi you have created a small beautiful piece of art on a rock. How cool is that?
Thank you, Mary. I choose to present it because it can be done on multiple surfaces, not only stone. The technique is quite simple and anyone can replicate it 🙂
Love, love, love Gabi. Mandalas are always so satisfying to draw, it’s almost like meditating and doing one on a rock or a pebble is so awesome. Love how your’s turned out and it’s such a special gift for your friend too.
I love making them too. You have to be patient and very careful about details, but I can do that since drawing is a perfect activity to relieve stress.