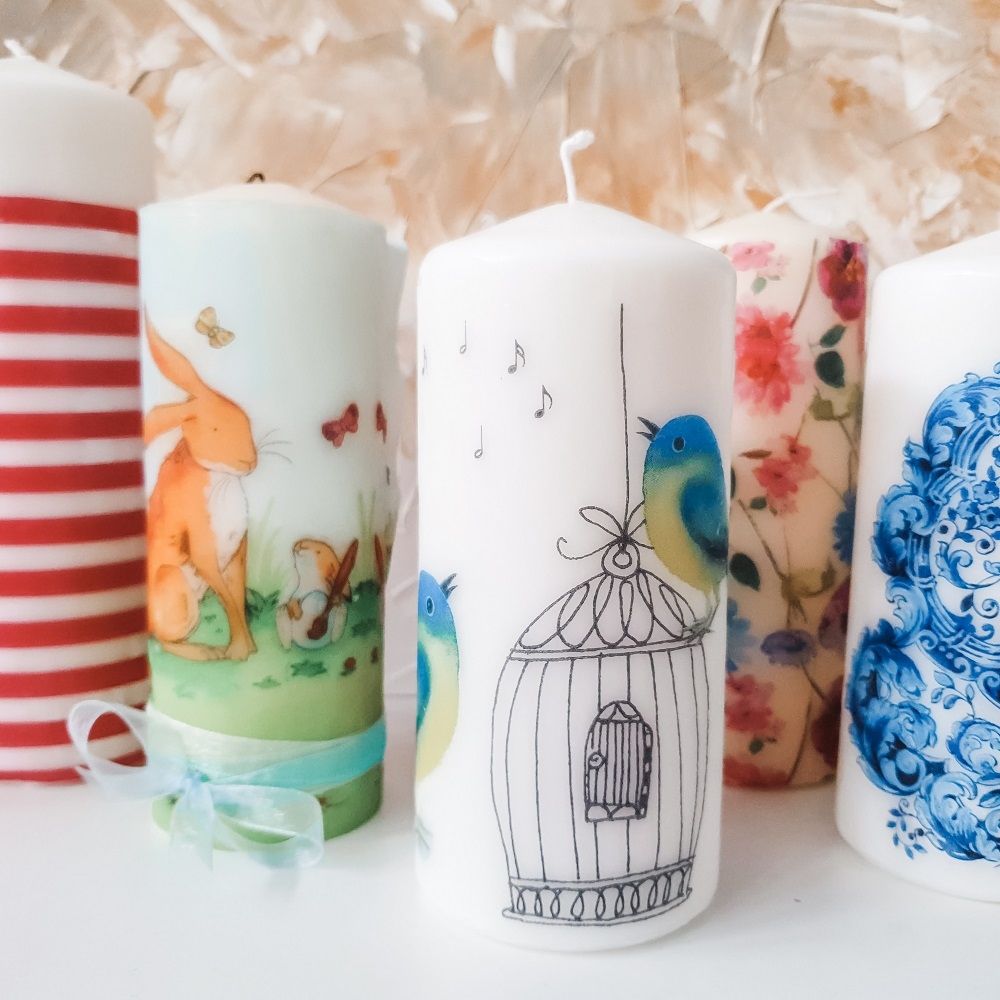
Seasonal decor is sometimes annoying because of the storage space it requires when the season ends. What if you can create seasonal decor that goes away along with the season and there’s no waste left behind? Candles, for example, are a perfect decor for any time of the year because they burn easily and provide a lot of opportunities to turn into or to be integrated in DIY projects.
So let me show you an easy way to decorate candles by transferring beautiful images from paper napkins to wax. Actually, you could even say that I’ll teach you how to DIY printed candles.
Materials
Materials are pretty easy to find, and here’s the list. As for the tools, a blow dryer is the main one, as the idea of this project is to transfer the image from the paper napkin to the candle using heat.

Look for pillar wax candles (mine were 2.5 in width) because they have a lower melting point and are safe (instead of paraffin, which is toxic). You also need printed paper napkins (they are used for decoupage crafts), parchment paper to wrap and protect the candle and masking tape to fix it. Since you’re going to heat the candle to make it absorb the paper, you’ll need to protect your hand with oven mitts or a towel.
How to Do It
First, cut off the image that you want to transfer from the paper napkin. If your napkin and candle are both white, the image that you’ll move will look like floating on the candle, and this is the easiest way to make the decorated candle look perfect. The paper around the image will become invisible after being absorbed by the candle, but even so you don’t need to keep much extra paper because it will make your work harder.

Peel off the napkin an keep only the printed coat, then place it on the candle. You can even use multiple images, but be careful to keep them in place while wrapping the candle in parchment paper. This protective coat will keep the images on place while transferring, and will prevent wax from sticking on your hands. Also, be careful not to overlap the paper on the image, but on the backside of the candle, or you heating work will get harder.

Fix the parchment paper with a bit of masking tape, and start heating the candle with the blow dryer, on medium heat. Use the oven mitts or the towel to protect the hand while holding the candle otherwise you’ll get burned easily.
It will take a couple of minutes to see that the image is going darker, which means that the wax is melting and absorbing the printed paper. Don’t overheat, because the candle will melt too much, but move the blow dryer slowly on the surface and give the image time to stick to the melted wax. You may lightly press the image here and there, to ease the process.

The process is over when there are no air bubbles left under the printed image. Then you may unwrap the candle and use it, but handle with care while it’s still warm.

There’s also a video about this project on my YouTube channel, and if you get there to see it, hit “Subscribe” for more DIY inspiration.
I love this technique so much that I’ve made a lot of printed candles over the years.

And it’s so easy that even a man with no DIY experience managed to do it, live on a national TV show in my country (enjoy the show HERE).

Follow me for more DIY advice here, on my blog, on Instagram, Pinterest or on my YouTube channel.
And if you are eager to discover more easy crafting projects out of nothing, take a look at my DIY book on Amazon HERE!


4 comments
De nota 10 😉
Super tari!! :DD
Sunt superbe, big like 😉
Ce dragute sunt 😀